
Discover how to arrange flowers and make a vibrant, professional-looking bouquet. Use these flower arrangement strategies to exhibit blossoms brilliantly while keeping them looking fresh.
How to Put Together a Flower Bouquet
Learn how to arrange flowers to make a lovely, colourful bouquet.
While anybody may throw a few flowers into a vase, the art of flower arrangement requires a bit more thought and finesse. A great centrepiece needs planning and meticulous preparation to retain the flowers’ colour and freshness. That said, learning how to arrange flowers in a vase and make it appear like a professional’s work is simple. A flower arrangement can be enjoyable and straightforward if you understand the fundamentals. We chatted with Charlotte Moss, interior designer and author of Charlotte Moss Flowers ($43, Amazon), to obtain her professional advice on creating and maintaining attractive arrangements. This step-by-step flower arrangement guide will help you create and showcase beautiful bouquets.
Step 1: Select a Floral Arrangement Design
Before you go flower shopping, decide on a colour plan for your arrangement. Then, when you go to buy flowers, you know you’re getting complementary hues. Monochromatic schemes that highlight the range of distinct colours of the same colour may be eye-catching. Try complementing hues that will stand out against one other for another high-impact floral arrangement.
While you might be precise about your colour strategy, there is no way to go wrong with the flower combination. Moss suggests choosing flowers depending on what is currently blooming in your yard or what is available at your local market. “The trick is to have an open mind and observe what draws you in,” she explains. “Being overly particular in your search might prevent you from seeing other attractive possibilities.” So instead, choose your favourites with different growth patterns, shapes, and sizes and discover how you can combine them.
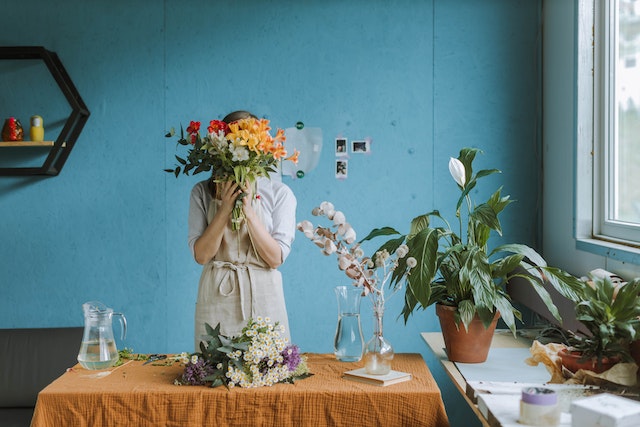
Step 2: Prepare and Cut Flowers
You might be tempted to start arranging your flowers as soon as you get home. However, certain critical actions must be followed to prepare flowers and extend their life. Remove any additional leaves or broken petals from the stalks first. Next, remove any undesirable buds that are on the same stem as a complete bloom. After cleaning the stems, make a new diagonal cut at the bottom of the stems. Finally, put the clipped stems in a vase or pail of water with cut flower food (this does not have to be your final vessel).
Step 3: Select a Vessel
Consider the flowers you’re using while choosing a vase or other container for your arrangement. Tulips, for example, require the support of a straight-sided vase, whereas long branches or top-heavy blooms may demand a weighted vessel, according to Moss. She likes to display flower arrangements in woven baskets rather than regular vases for an extra natural texture. Line the basket with a plastic container to store water and keep the flowers in place (shop your kitchen cabinets or repurpose plastic water bottles and another packaging). Fill it with Moss around the container to camouflage it inside the basket if required.
Step 4: Get Your Flower Vase Ready
The most crucial flower arrangement method has nothing to do with the flowers themselves—all it’s about is the vessel you place them in. If the flowers do not have a strong basis, they will break apart, and your arrangement will fall apart. Instead, make a grid of floral tape around the lip of the vase to keep the flowers in place. Stick the stems through the grid’s holes to hold them in place. You may also buy a floral frog ($7 at Michael’s), vessel inserts with pegs for inserting stems. You can even make a flowery frog with a short bit of chicken wire curled into a ball.
Step 5: Make a Vegetation Foundation
Starting with foliage as a basis is the most acceptable method to arrange flowers. Greenery options include eucalyptus, ivy, and fern fronds. Next, make an inverted triangle form with the foliage stalks. This ensures that your layout has both a horizontal and vertical presence. Also, recut stems before placing them in the vase.
Step 6: Finish with Focal Flowers
The biggest blooms, or those with a distinctive colour or texture, are focal flowers. Use odd numbers carefully for a more natural (not symmetrical) appearance. Don’t put the central flowers so far out on the sides that they seem drooping and heavy rather than vigorous and cheerful. Placing the vase on a lazy Susan allows you to see all sides of the vase without having to move it.
Step 7: Fill in the Gaps with Filler Flowers
Fill in the arrangement with lesser flowers and textured pieces to fill in around the central blooms. Again, do not arrange all supporting flowers vertically or to the sides. Consider the arrangement’s form a dome, and you must fill in all angles of that dome for it to seem complete—cluster smaller flowers in groups of three or five to form clustering, as seen in nature.
Step 8: Complete Your Floral Arrangement
Finish with floaters or delicate blossoms such as baby’s breath, sedum, or yarrow. Place them last to avoid being squashed or hidden by larger blooms. Moss recommends spritzing your final flower arrangement with water before presenting it to simulate the effect of fresh dew. Then, to keep the flowers moist and fresh, refill the vase with water.
Was he on this page?